
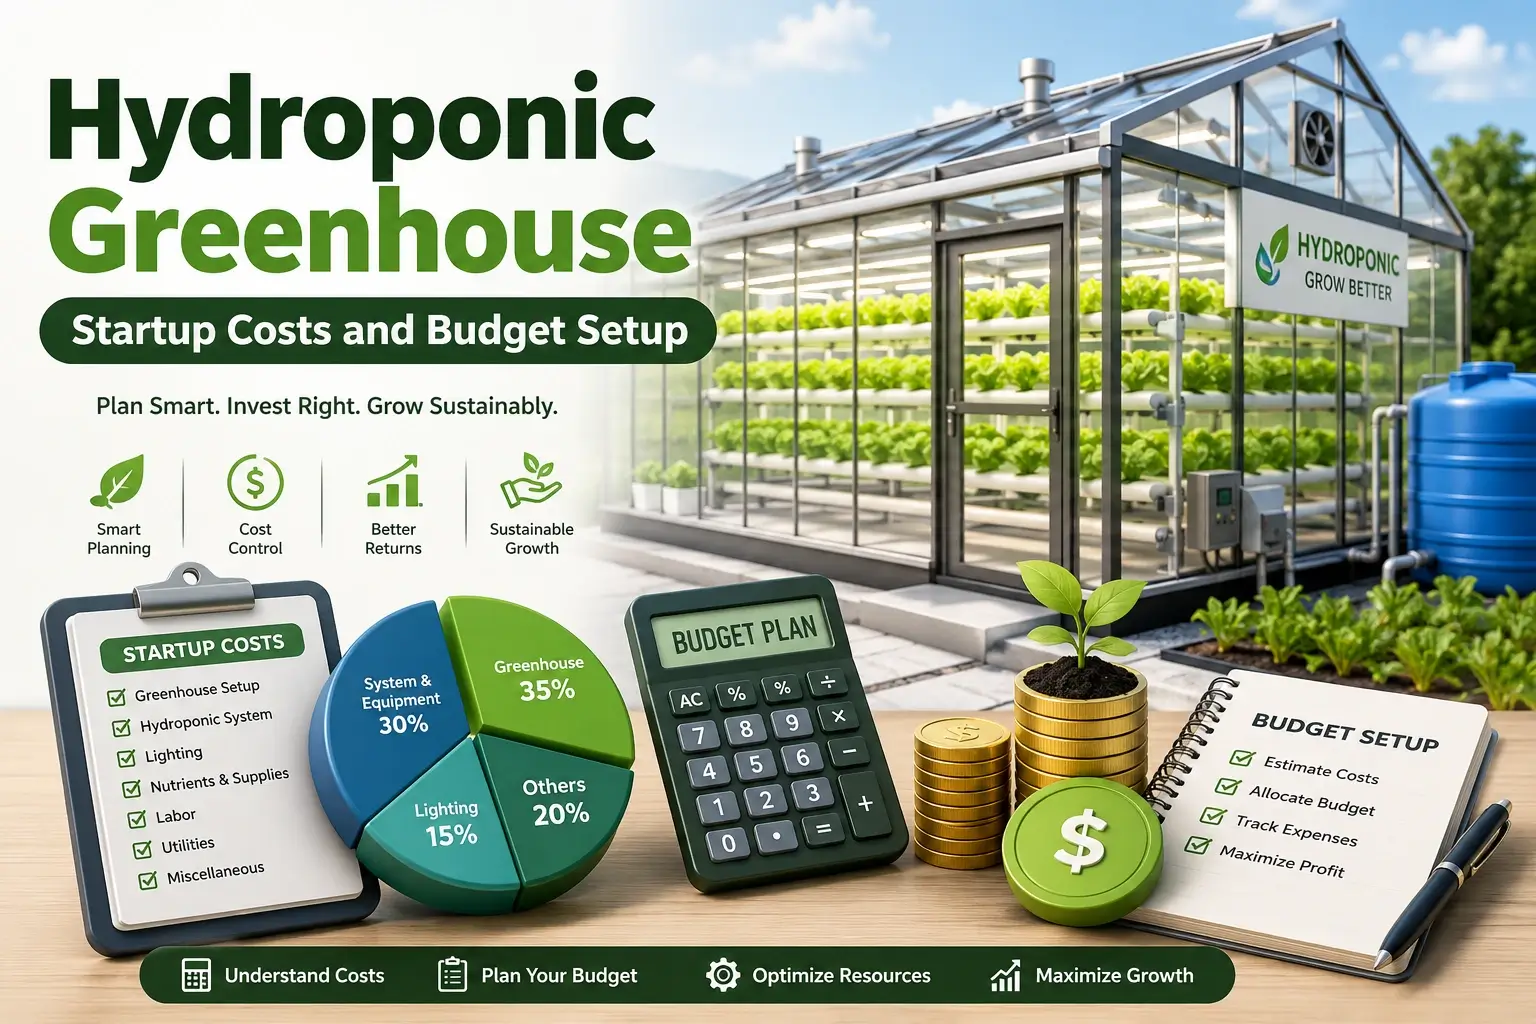
When I first started looking into building a hydroponic greenhouse, I could never find numbers that matched what people actually paid. Some guides gave tiny sums that left out half the work, others quoted huge budgets for gear you simply don’t need when starting out. I’ve since helped set up three small commercial units, and learned that costs vary wildly based on what you want to grow, where you are, and how much work you’re willing to do yourself. This guide lays out exactly what goes into your budget, what you can expect to pay, and how to avoid throwing money away on things that don’t matter. There are no hidden extras here – just what you need to know before you order a single thing.
Table of Contents
Advance Indoor Plant Growing & Care
Learn advanced indoor plant growing and care techniques to keep houseplants healthy, vibrant, and thriving throughout the year.
Why no single “right” price exists
You might see one grower say they started for £10,000, while another spent £50,000 on the same size space. The difference comes down to four main things: the type of structure you choose, whether you need to run year-round, what crops you plan to grow, and how much automation you add. A basic polytunnel for summer salad greens will cost a fraction of a glass building with heating and lights for winter tomatoes.
Your location changes things too. Ground that needs levelling or drainage work will add thousands. If mains water or electricity is far from your site, connection costs can double your initial spend. It is easy to look at one example and assume your setup will cost the same – but your situation is unique, and your budget should reflect that.
Separating one-off costs from ongoing bills
This is the mistake I see most often. People budget for the building and the growing system, then run out of money three months before their first harvest. You need to split your costs clearly into two groups: capital costs that you pay once to get started, and running costs that come in every month or year.
Capital costs include the structure, tanks, pumps, benches, tools and permits. Running costs cover electricity, water, nutrients, seeds, packaging, insurance and labour. Most new growers also need enough money set aside to cover three to six months of running costs before they earn any income. If you forget this part, even a well-built greenhouse will struggle to keep going.
Site preparation and groundworks
Before you put up a single frame, your site needs to be ready. This work is rarely glamorous, but skipping it leads to problems later. For a 100‑square‑metre plot, expect to pay between £1,500 and £4,000 for basic work. This includes clearing vegetation, levelling the ground, laying a solid base of gravel or concrete, and putting in paths so you can move around easily.
If you need new drainage, or have to bring in heavy machinery to level sloping ground, this figure will rise. You also need to check access – if lorries can’t reach your site easily, delivery charges will add up fast. In some areas you will need planning permission just to prepare the land, so check with your local council before you start digging.
Greenhouse structure options and costs
Your building is your biggest single expense, and the choice here sets the tone for your whole budget. There are three common options, each with pros and cons.
| Structure Type | Cost for 100m² | Lifespan | Best For |
|---|---|---|---|
| UV-stable polytunnel | £3,000–£6,000 | 5–8 years | Seasonal growing and tight budgets |
| Polycarbonate rigid frame | £7,000–£12,000 | 15–20 years | Year-round use and moderate weather |
| Glass commercial greenhouse | £10,000–£18,000 | 25+ years | Heavy use and professional long-term growing |
Polytunnels are the cheapest way to start, but their plastic covers need replacing every few years. Rigid polycarbonate structures retain heat more effectively and withstand wind and heavy rain, making them useful in exposed locations. Glass greenhouses have the longest lifespan and a professional appearance, but they cost more upfront and require stronger foundations.
Hydroponic growing systems
The system you pick depends entirely on what you want to grow. For leafy greens and herbs, NFT channels or simple raft systems work well and cost less. For tomatoes, peppers or cucumbers, Dutch buckets or drip systems are more practical.
For 100m², an NFT setup will usually cost between £2,500 and £5,000. Dutch buckets come in at £2,000 to £4,500. You also need to add tanks, pipes, pumps and filters – these will add another £1,200 to £3,000. It is tempting to go for the cheapest kit you can find, but thin piping or weak pumps will fail within a year. Spending a little more on core plumbing parts now saves you replacing them later.
Monitoring and testing equipment
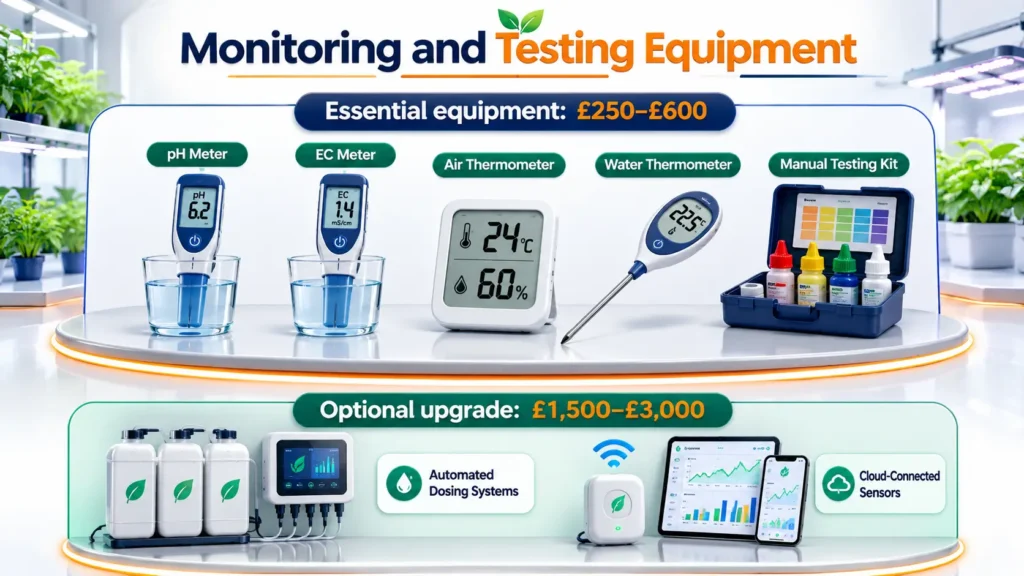
You do not need a room full of screens and sensors, but you do need a few reliable tools. At the very least you need pH meters, EC meters to check nutrient strength, and thermometers for air and water. A basic set of good‑quality meters will cost £250 to £600.
Many suppliers will try to sell you automated dosing systems or cloud‑connected sensors from day one. These make life easier later, but they add £1,500 to £3,000 to your bill. You can manage perfectly well with manual checks for the first year or two, and add automation once your income is steady.
Ventilation and basic climate control
Good airflow stops mold and disease, and keeps temperatures steady. For a 100m² space, basic intake and extract fans plus automatic vents will cost £600 to £1,500. Shade netting or thermal screens add another £400 to £1,200.
If you plan to grow through winter, you will need heating. Electric heaters are simple to install but expensive to run long‑term. Gas or biomass systems cost more upfront – between £1,500 and £4,000 – but work out cheaper if you use them regularly. Do not guess how much heating you need; get a calculation based on your structure type and local winter temperatures.
Lighting and power supply
Most new growers can start with natural light, especially if they grow in spring and summer. If you want to extend growing hours or produce through short winter days, supplemental LED lighting will cost £2,000 to £5,000 for 100m².
You also need to check your power supply. If your site only has a single domestic socket, you may need to upgrade to a three‑phase supply. This can cost £1,000 to £3,500, and often takes weeks to arrange. It is worth checking this early – it is one of the most common hidden costs people forget.
Consumables, tools and one‑off extras
There are always small items that slip your mind until you need them. You will need seed trays, growing media, crates, trolleys, a wash station for harvesting, and basic cleaning supplies. For 100m², allow £800 to £2,000 for these.
You also need to set aside money for permits, food safety checks and insurance. These usually come to £300 to £1,500, depending on your local rules. If you skip these, you may face fines or be unable to sell to shops and restaurants.
Typical total startup budgets
To give you a clear idea of what to expect, here are three common setups for 100m²:
- Pilot or startup setup: £12,000 – £20,000 – basic polytunnel, manual systems, natural light, minimum extras
- Standard commercial setup: £22,000 – £40,000 – rigid polycarbonate frame, semi‑automated, basic heating and ventilation
- Full year‑round setup: £45,000 – £70,000 – glass or high‑grade frame, full climate control, lighting, backup power
Monthly running costs to plan for
Once you are up and running, you will spend roughly these amounts each month for 100m²: electricity and water £250–£600, nutrients and seeds £200–£450, labor £300–£800, and insurance and maintenance £100–£250.
Prices will shift with energy costs and seasonal demand. Many growers find winter electricity bills are double what they pay in summer, so keep a buffer for these changes.
Building your budget and avoiding waste
When you put your budget together, follow these simple rules:
- Always add 15% extra for unexpected costs – things rarely go exactly to plan
- Get at least three quotes for every major job or item
- Buy the best core parts you can afford, but hold off on fancy extras until you are earning
Do not copy someone else’s budget exactly. Your crops, site and local prices are different, and what works for one person may not work for you.
Conclusion
Setting up a hydroponic greenhouse does not need to cost a fortune, but it does need careful planning. You do not need the newest or most expensive gear to grow good crops – you just need to spend your money on the things that actually make a difference. Start small if you can, learn as you go, and expand only when your setup is paying for itself. The most successful growers I know are the ones who kept their first budget simple, and saved their big investments for later.
Frequently Asked Questions on Best Hydroponic Greenhouse Startup Cost and Budget Setup in UK
This course teaches practical methods for growing, maintaining and caring for indoor plants. It covers plant selection, watering, lighting, feeding, repotting and common plant health problems.
The course is suitable for indoor gardening enthusiasts, plant owners, beginners, aspiring horticulturists and anyone interested in improving their plant-care knowledge.
No previous gardening experience is required. The course explains essential concepts clearly, making it suitable for beginners as well as experienced plant owners.
You will learn how to choose suitable plants, provide the correct light and water, maintain healthy soil, apply fertilisers and create an ideal indoor growing environment.
Yes. You will learn how to identify and manage problems such as yellow leaves, root rot, poor growth, overwatering, underwatering, pests and plant diseases.
Yes. The course introduces common propagation techniques, including stem cuttings, division and other practical methods for growing new plants.
You will learn how to select plants based on available light, room temperature, humidity, space and the amount of care each plant requires.
Yes. It covers suitable potting mixtures, container selection, drainage and the correct techniques for safely repotting indoor plants.
Yes. The course explains how indoor plant requirements change with the seasons and how to adjust watering, feeding, lighting and temperature accordingly.
After completing the course, you can confidently care for your own indoor plants, support others with plant-care advice or explore further opportunities in gardening, horticulture and plant maintenance.
Recent Posts

Eco Friendly Home Upgrades to Lower Energy Costs
July 31, 2026


How to Sell on eBay: The Ultimate Step-by-Step Guide
July 30, 2026
July 31, 2026


